Grow Your Own Food – Plant a Vegetable Garden!
Grow your own food! I am always trying to do things to improve and maintain my health. With the rising costs of grocery items these days and selecting produce from places I am unsure of, it makes total sense to grow your own foods where possible. That way you know that no pesticides have been used and there are no additives.
So, I have decided to start my own vegetable garden from scratch. So far it has been a true learning experience. I have done some research and here is my step-by-step guide in case you are a rookie at this like me!
Step 1: Choose the Right Location
Sunlight: Ensure the area gets at least 6–8 hours of full sun per day.
Drainage: Avoid spots that flood or stay soggy after rain.
Proximity: Keep it close to your house for easy access and maintenance.
Water access: Choose a location near a water source.
I have the perfect spot chosen.
Step 2: Decide What to Grow
Start simple with vegetables your household enjoys eating.
Consider your climate and growing season (e.g., Ontario has a short season, so cold-hardy or quick-growing crops are best).
Beginners’ favorites: Bush beans, tomatoes, lettuce, carrots, radishes, zucchini, and peppers.
I am being brave and also am planting peppers, broccoli, and spinach, cucumber, and swiss chard but no radishes or zucchini.
Step 3: Plan Your Garden Layout
Choose between in-ground beds, raised beds, or containers.
Map out row spacing, plant spacing, and companion planting (certain plants grow better together).
Think about crop rotation if you’ll plant again next year.
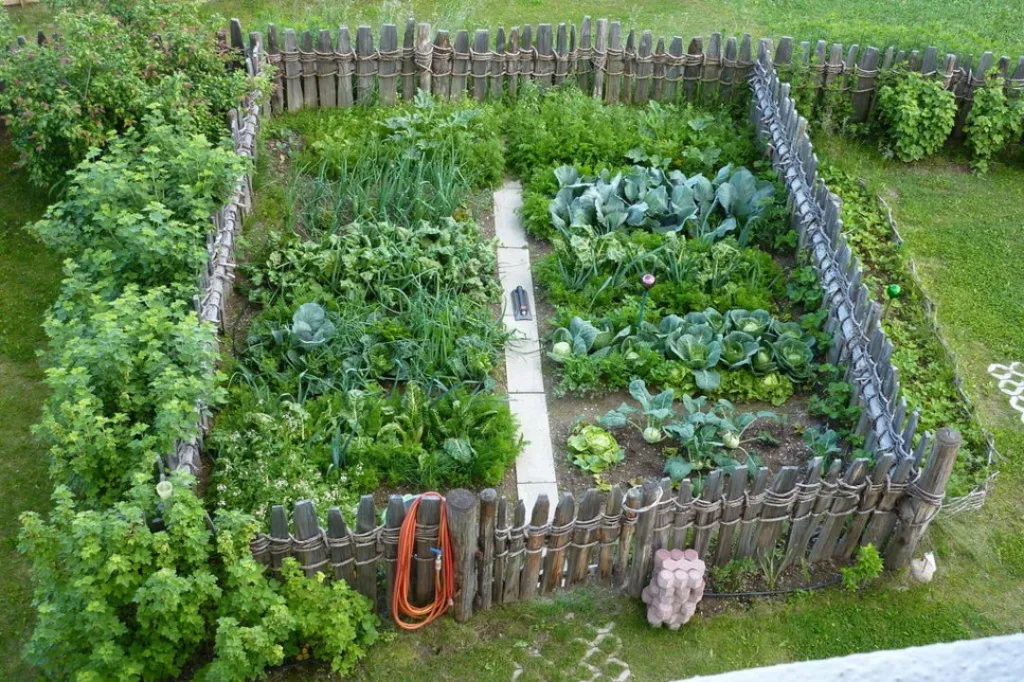
I am doing an in-ground bed and have made a wooden frame for my 8 X 8 ft. space. I also have a plan as to what veggies to plant near each other.
Step 4: Prepare the Soil
Clear the area: Remove grass, weeds, and debris.
Loosen the soil: Use a shovel or tiller to dig down about 8–12 inches.
Test the soil (optional but helpful): Check pH and nutrient levels using a soil test kit or send it to a lab.
Amend the soil: Add compost, aged manure, or topsoil to improve fertility and drainage.
I tried to dig out my space but that was not working well for me. I will be using a rototiller. After the grass has been removed and the space dug down 8 inches I will add a layer of cardboard that will help keep new weeds from growing and provide a barrier which will decompose naturally over time. I will then put down a compost/manure layer followed by a layer of rich topsoil and the I will be ready to plant after the May long weekend.
Step 5: Start Planting
Follow seed packet instructions for depth and spacing.
Start seeds indoors for crops like tomatoes or peppers, or buy seedlings from a nursery.
Direct sow hardy crops like carrots, spinach, and beans into the soil.
I have some pant seedlings started by a friend that I will use for celery, broccoli, peppers, and tomatoes and the rest of my crop will be directly sown into the soil.
Step 6: Water and Mulch
Water consistently, especially when seedlings are young.
Use mulch (like straw or shredded leaves) to retain moisture and reduce weeds.
Step 7: Maintain Your Garden
Weed regularly to avoid competition for nutrients.
Watch for pests and diseases and deal with them early (organic methods or insecticidal soap if needed).
Support plants with cages or stakes (e.g., for tomatoes and cucumbers).
I have stakes to support my cucumbers, tomatoes, and beans. I also have a netting that will surround the space to protect from animals.
Step 8: Harvest and Enjoy
Harvest at the right time for the best taste and continued production.
Check daily during peak season, as vegetables can mature quickly.
I am currently about to begin Stage 4. Hopefully, my rototiller will arrive on Monday! I chose to purchase one since it is actually less expensive than to rent. I chose an electric one as I have difficulty pulling the cord in the gas models. We will see how that goes! I will report back later in the summer when I have some pictures of my results.
I guess this means canning is next! Oh no!